[ad_1]

Do you wish to use the Kali Linux operating system alongside Windows 11? In that case, this article teaches how to install Kali Linux on Windows 11.
In this guide, you will first learn how to enable Windows Subsystem for Linux on Windows 11. After that, you will learn how to install the Kali Linux app on your Windows 11 computer.
Hence, if you follow the steps in this article correctly, you should be able to install Kali Linux on Windows 11 seamlessly. Besides, a section in this guide answers some of the frequently asked questions about the topic in discussion.
Enable Windows Subsystems For Linux On Windows 11

Before you will be able to use Kali Linux on your Windows 11 PC, you need to enable Windows Subsystems for Linux.
There are numerous ways to do that. However, in this guide, we will be revealing how to do it via Control Panel.
Follow the steps below to enable Windows Subsystems for Linux on Windows 11 via Control Panel.
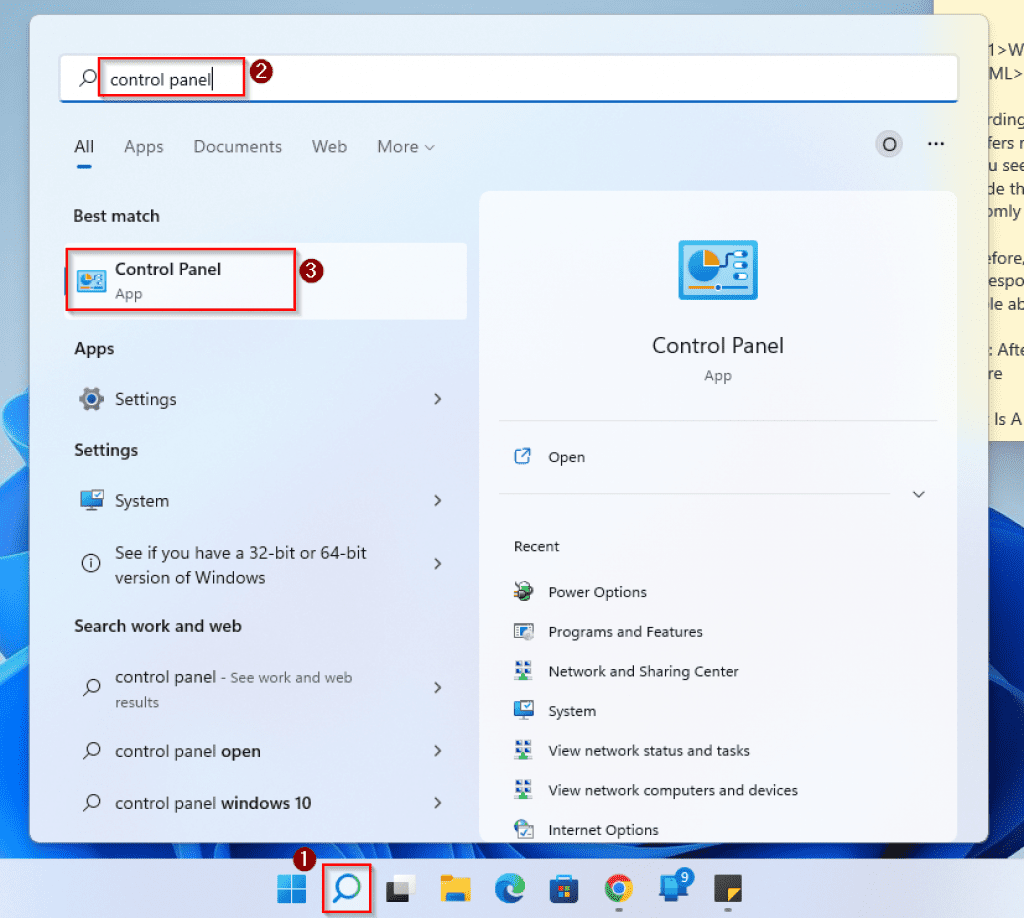
- Click the Search icon on your Windows 11 taskbar and type “Control panel” in the search field. Then, click the Control Panel app from the search result.
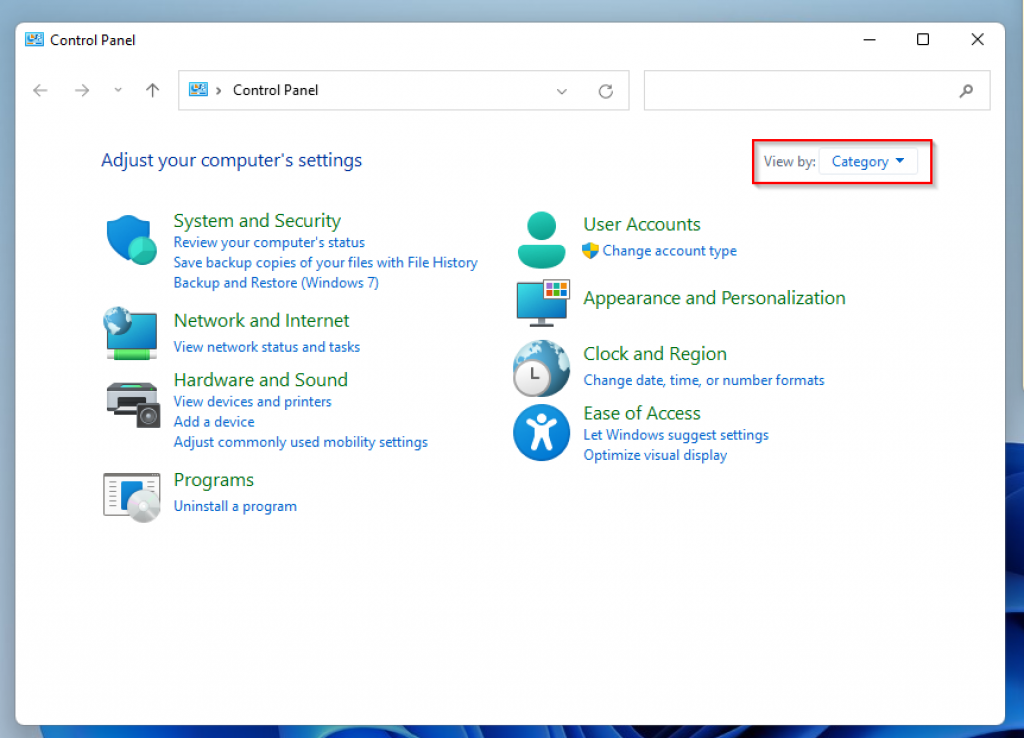
- When Control Panel opens, confirm that View by is set to Category. If not, click the drop-down and select Category.
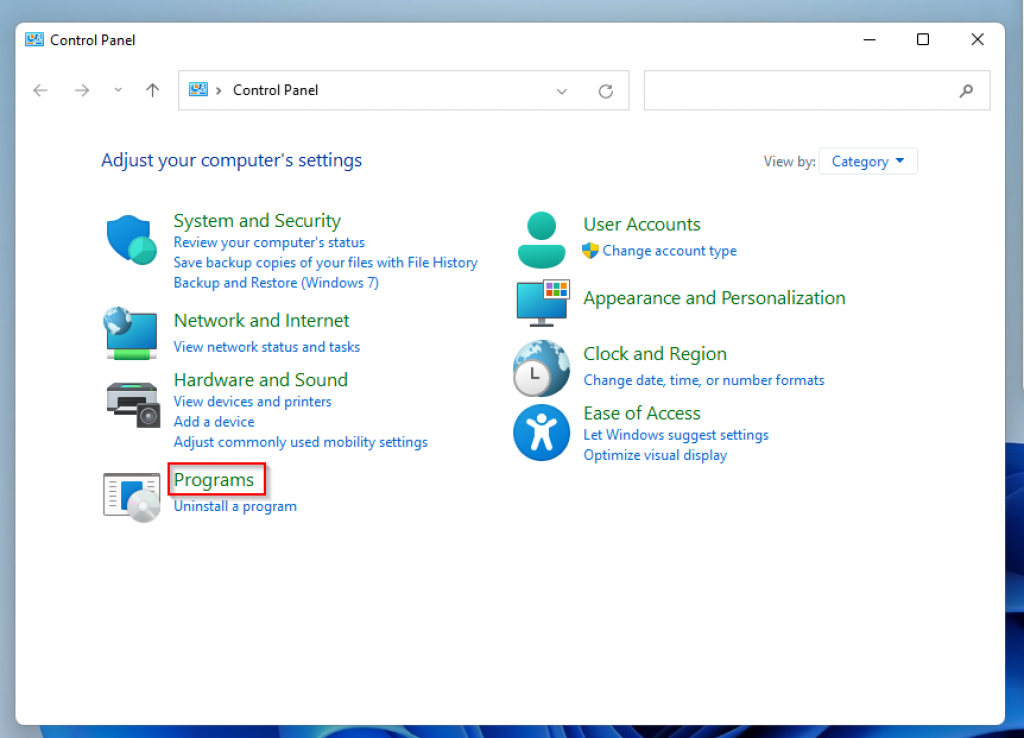
- After doing that, select Programs from the category.
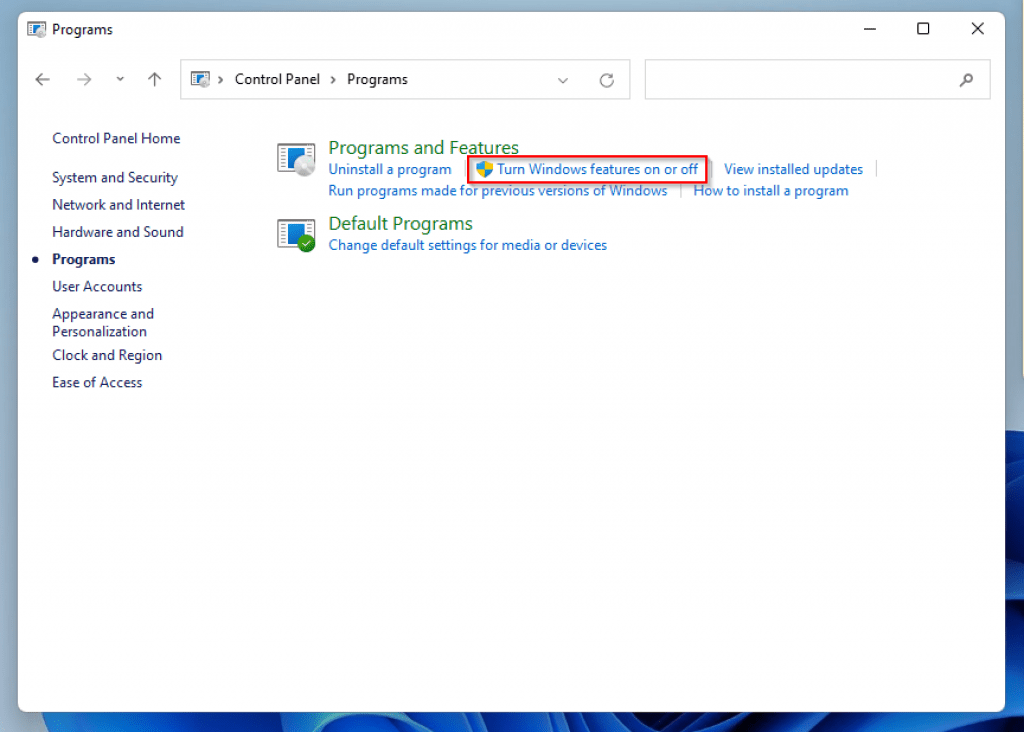
- Under Programs and Features, click Turn Windows features on or off.
- By doing that, the Windows Features window will open.
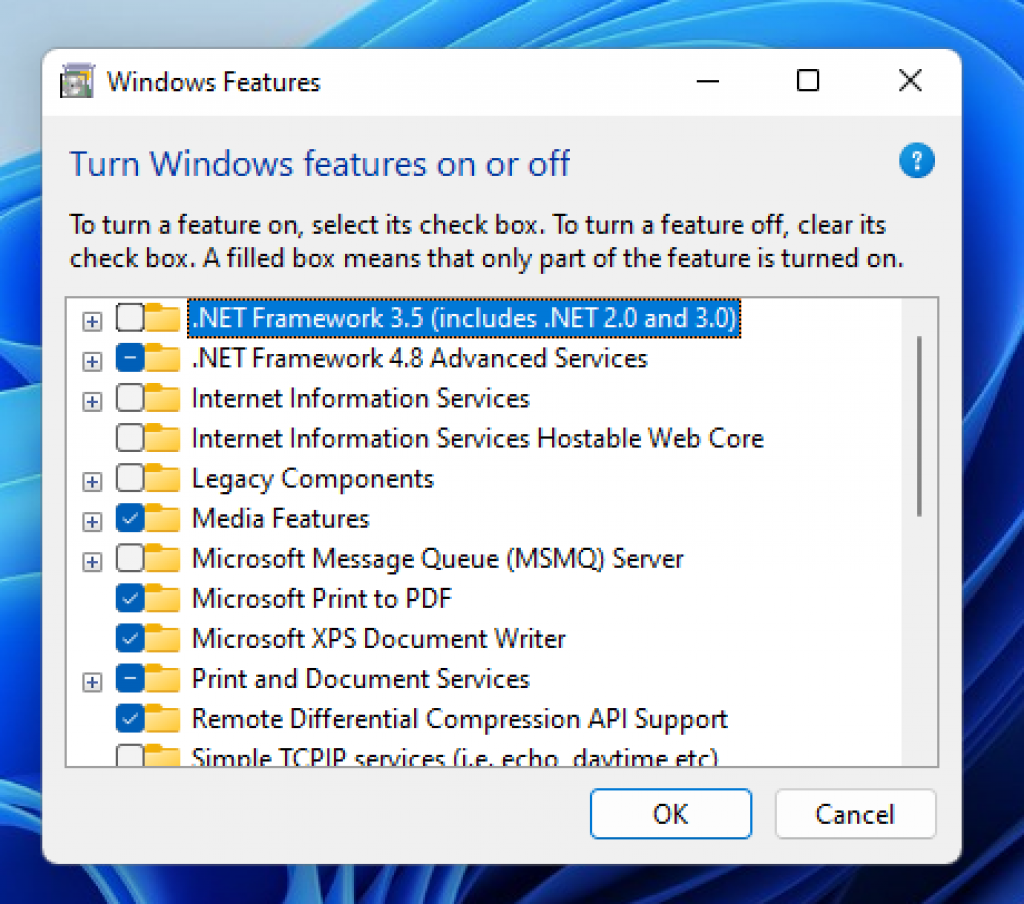
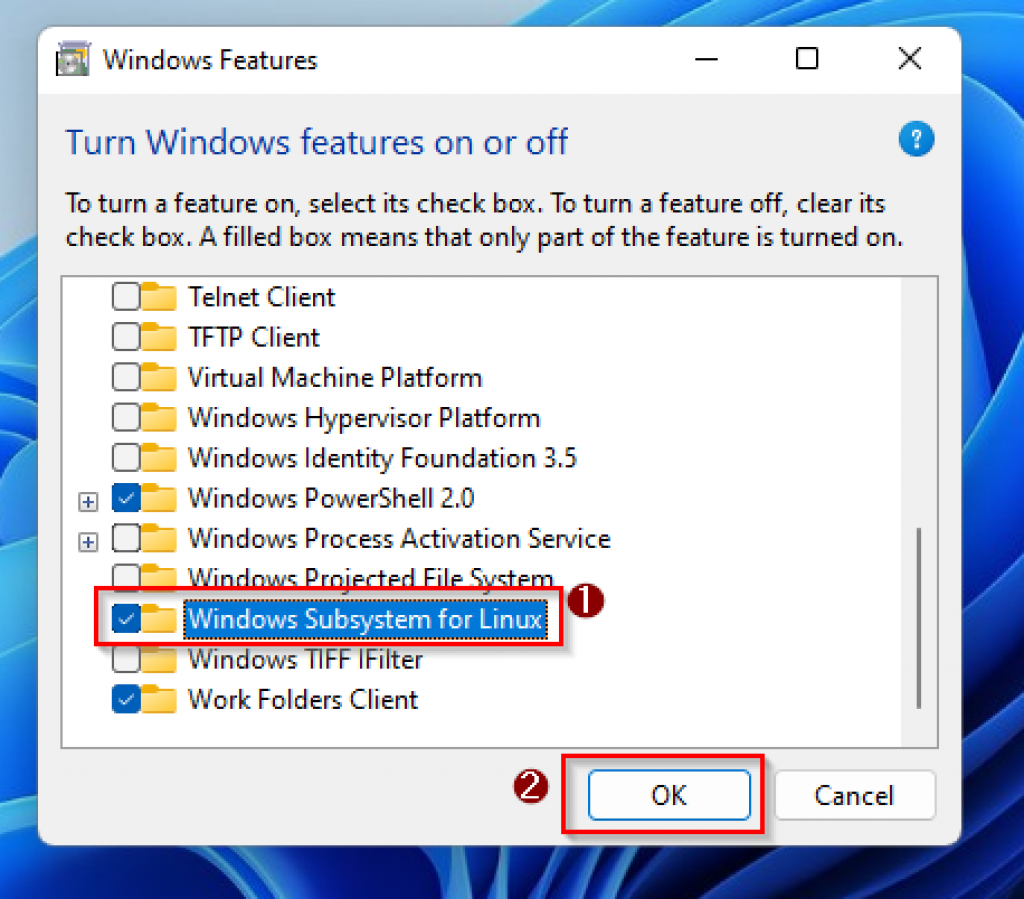
- Then, scroll down to locate Windows Subsystem for Linux and check the box beside it. After that, press the OK button.
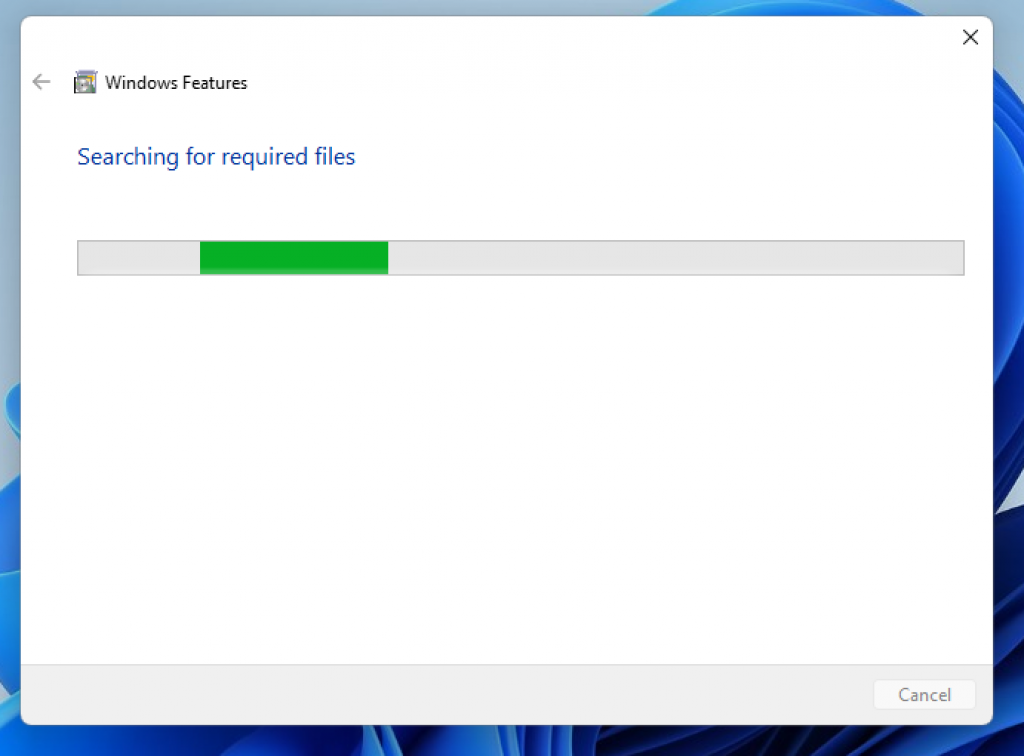
- After doing that, Windows 11 will start to enable the feature.
- After that, you have to reboot your PC by clicking Restart now to effect the changes before downloading the Kali Linux app.

If you use other methods to Enable Windows Subsystems For Linux, you still have to reboot your computer before downloading the Kali Linux app. Otherwise, the application won’t work.
Download And Install Kali Linux App On Windows 11

When you are done enabling Windows Subsystem for Linux, follow the steps below to download and install the Kali Linux app on Windows 11.
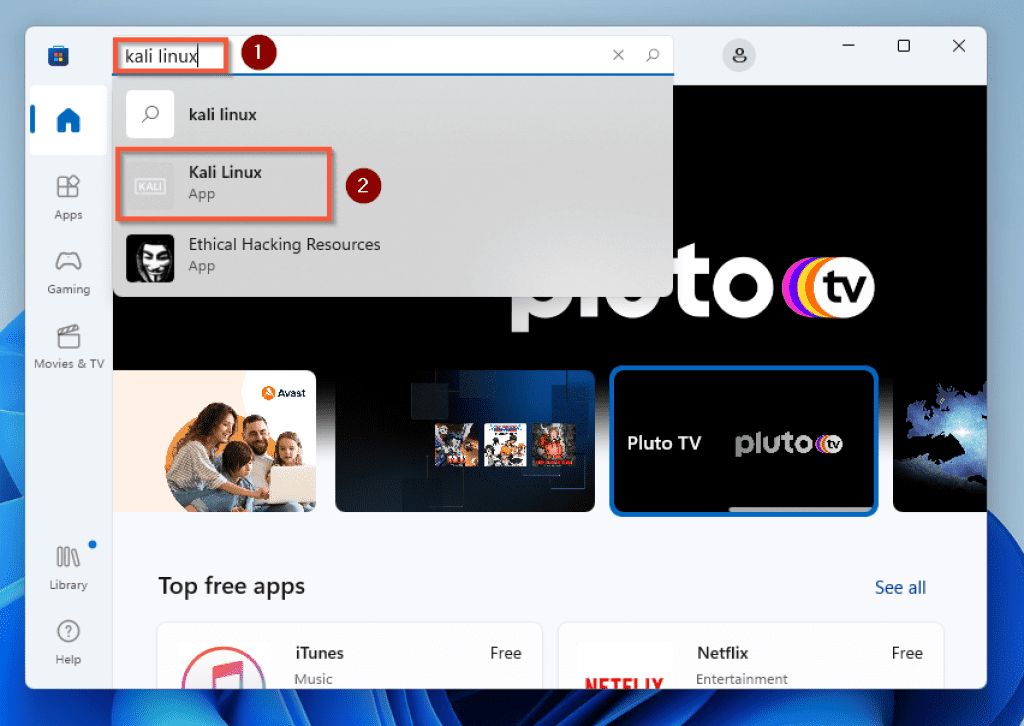
- Click the Search icon on the Windows 11 taskbar. Then, type “Microsoft store” on the search field.
- From the search result, click the Microsoft Store app.

Alternatively, you can click the Microsoft Store icon on the taskbar to launch the Microsoft Store application. That’s if the Microsoft Store icon is pinned to your Windows 11 PC taskbar.

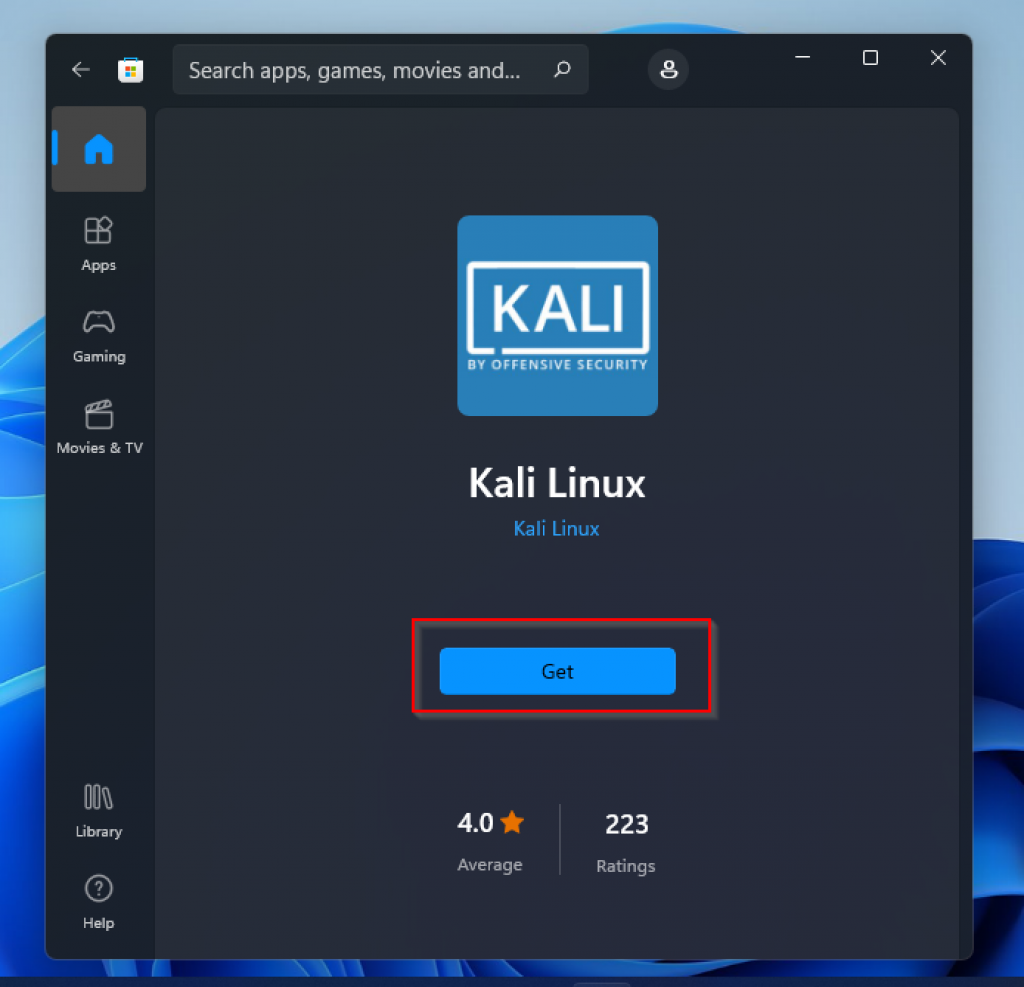
- When the Microsoft Store opens, type “Kali Linux” on the search bar. Then, from the search result, click the Kali Linux App.
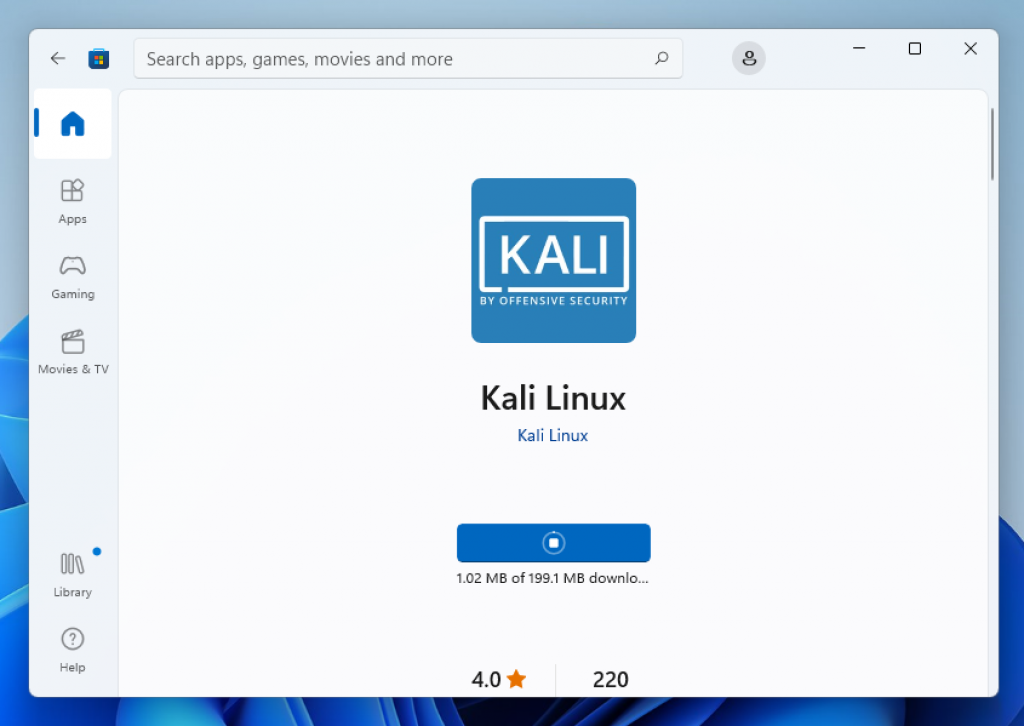
- Once the application’s page opens, click the Get button to download the application.
As of the time I wrote this guide, the download size of the Kali Linux app was about 199.1 MB. Depending on your internet speed, it might take a while for the application to download on your computer.
- When the app finally downloads, it will automatically install on your Windows 11 computer. So, click the Open button to launch the application.
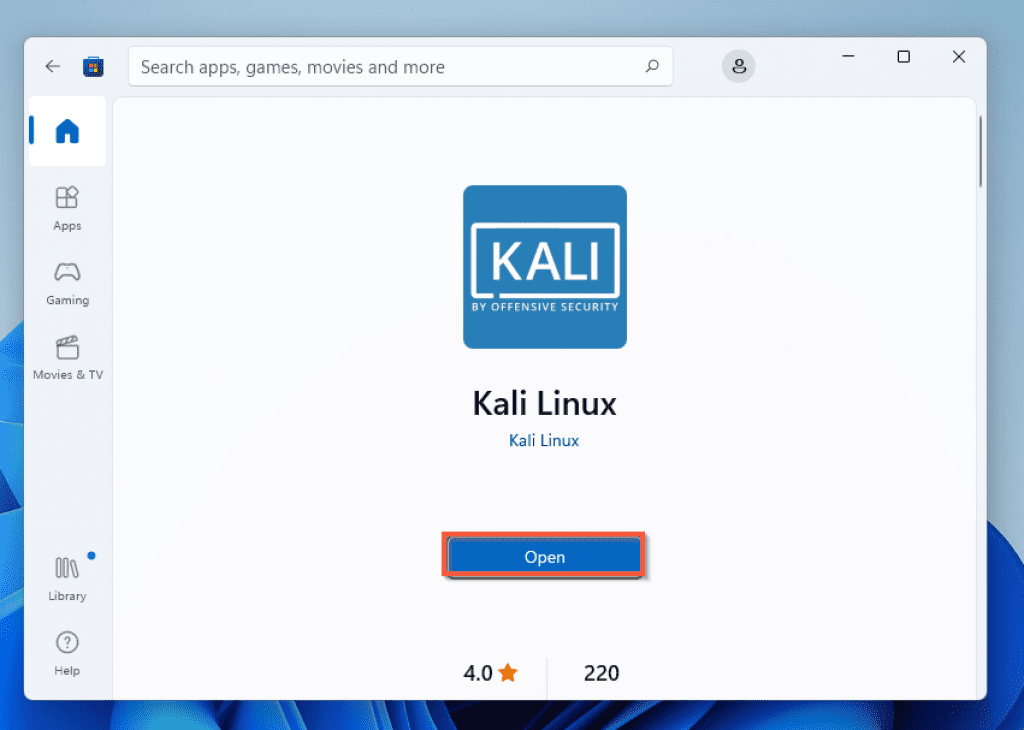
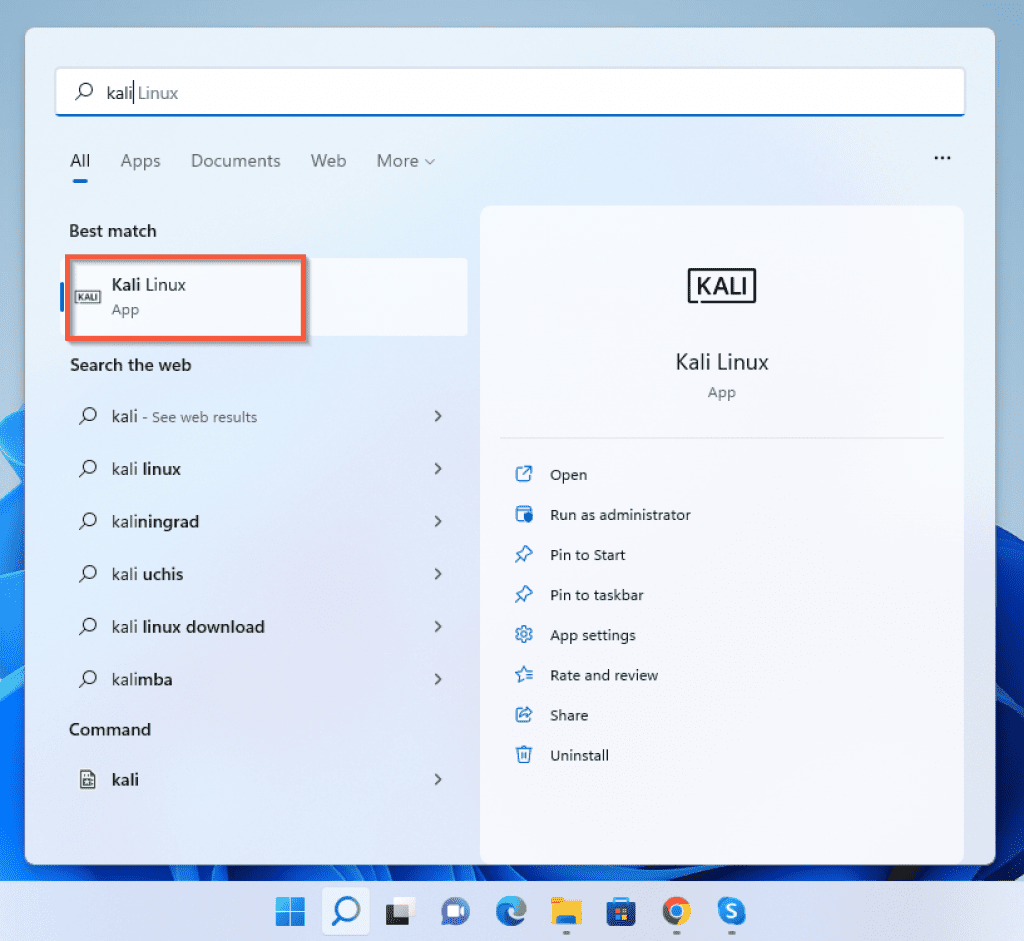
If you want to open the Kali Linux app in the future, you can use the Windows 11 search feature to locate and launch the app.
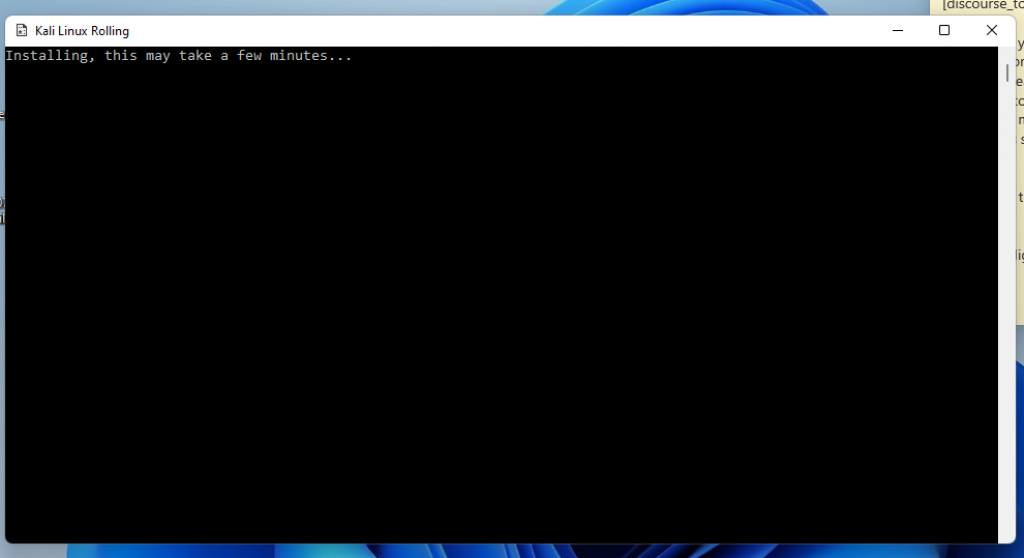
- Once you open the Kali Linux app, it initiates the installation of Kali Linux on your Windows 11 PC.
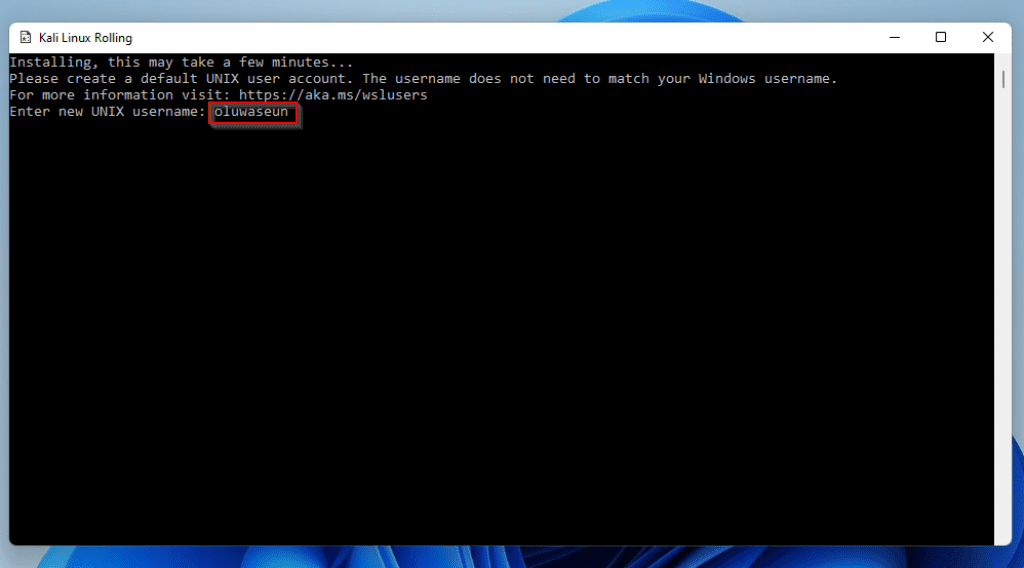
- During the installation, you will be prompted to enter a username. So, in front of Enter new UNIX username, enter a username.
By the way, use lowercase while inputting a username. For example, according to the screenshot below, I used oluwaseun as the username.
After that, press Enter on your keyboard.
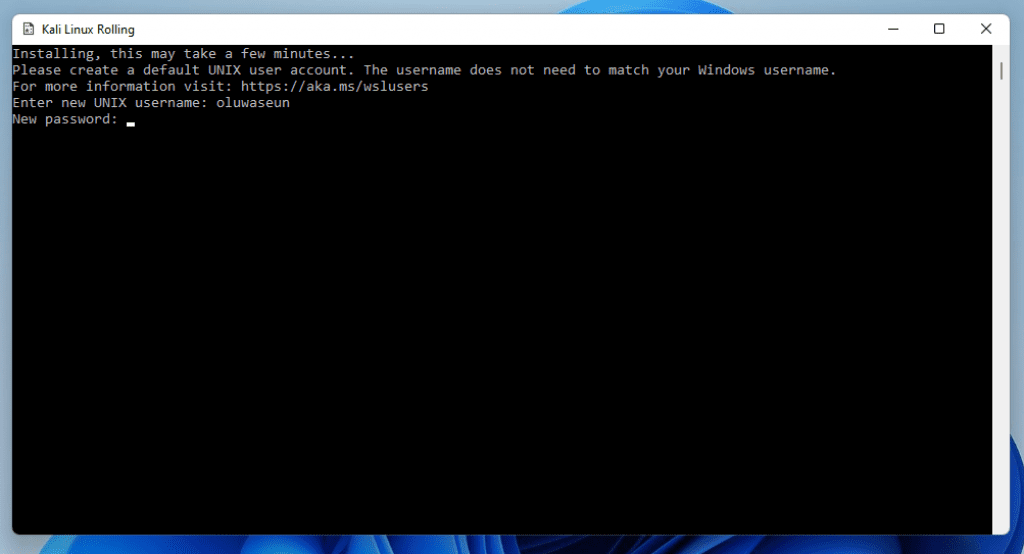
- After that, you will be prompted to input a password. After inputting a password, press Enter on your keyboard.
When you type your password, nothing will be displayed.
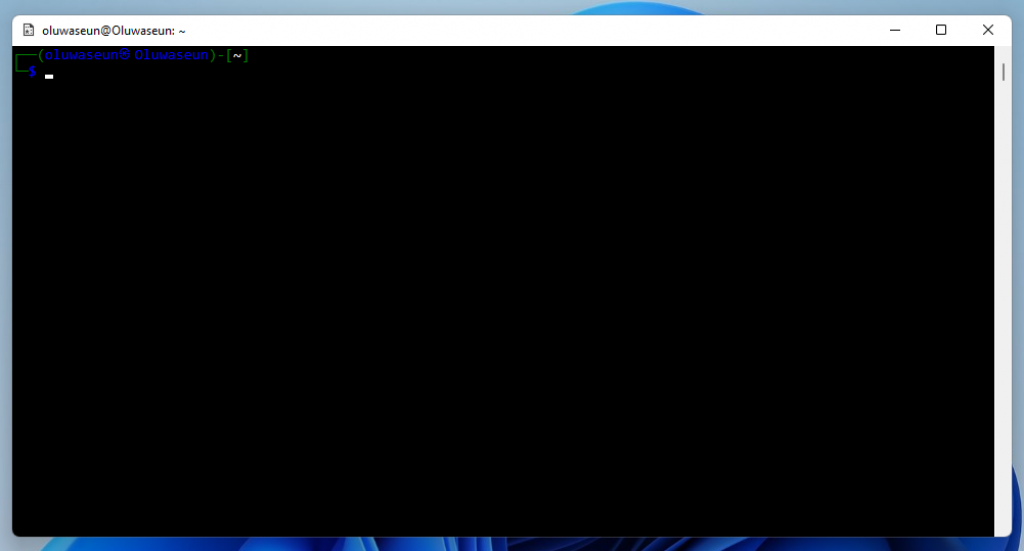
- After inputting the password and pressing Enter, you will once again be prompted to retype the password. When you are down retyping the password, press Enter.

- There you have it! You have successfully installed Kali Linux on your Windows 11 PC.
How To Install Kali Linux On Windows 11: Frequently Asked Questions

Absolutely! You can download and install the Kali Linux application on your Windows 10 computer via the Microsoft Store. However, before you do that, you must first enable Windows Subsystem for Linux.
Sure. As with Kali Linux, Ubuntu is available on Windows 11 as an application via the Microsoft Store.
Yes, they do. Hackers mostly use Kali Linux due to the fact that it has security analysis, penetration testing, and security auditing.
In fact, Kali Linux consists of over 600 tools for information security.
Yes, Kali Linux is free to install. Moreover, if you want to install this Linux distribution on Windows 11, it is also for download on the Windows Microsoft Store.
Mati Aharoni is the founder and main developer of Kali Linux.
How To Install Kali Linux On Windows 11: My Final Thoughts

Installing Kali Linux on your Windows 11 PC might seem difficult and complicated. However, with this guide, you have nothing to worry about.
Hence, if you follow the steps closely in the guide, you should be able to download and install Kali Linux on your PC easily. Basically, this guide covered how to enable Windows Subsystems for Linux before downloading Kali Linux.
Also, we learned how to download and install the Kali Linux application from the Windows 11 Microsoft Store.
I hope you found this guide helpful? If you found it helpful, kindly spare two minutes to share your experience at Itechguides Community Forum.
Also, if you have any questions regarding the guide or if the steps didn’t work for you, don’t hesitate to post your question at Itechguides Community Forum. Our team and other community members will get back to you with a reply as soon as possible.
Finally, visit our Windows 11 How-To page for more Windows 11 guides and fixes.
References And Further Reading
- techcommunity.microsoft.com – How to install the Linux Windows Subsystem in Windows 11
- kali.org – Installing Kali Linux
- Itechguides Community Forum